
When you use properties to improve your day-to-day customer service quality, it works. In this article, we will show you where to find your lead's or user's properties and their company properties in your inbox and how you can manage them.
What are contact and company properties?
Contact properties are a set of information about your contact with simple data. For example:
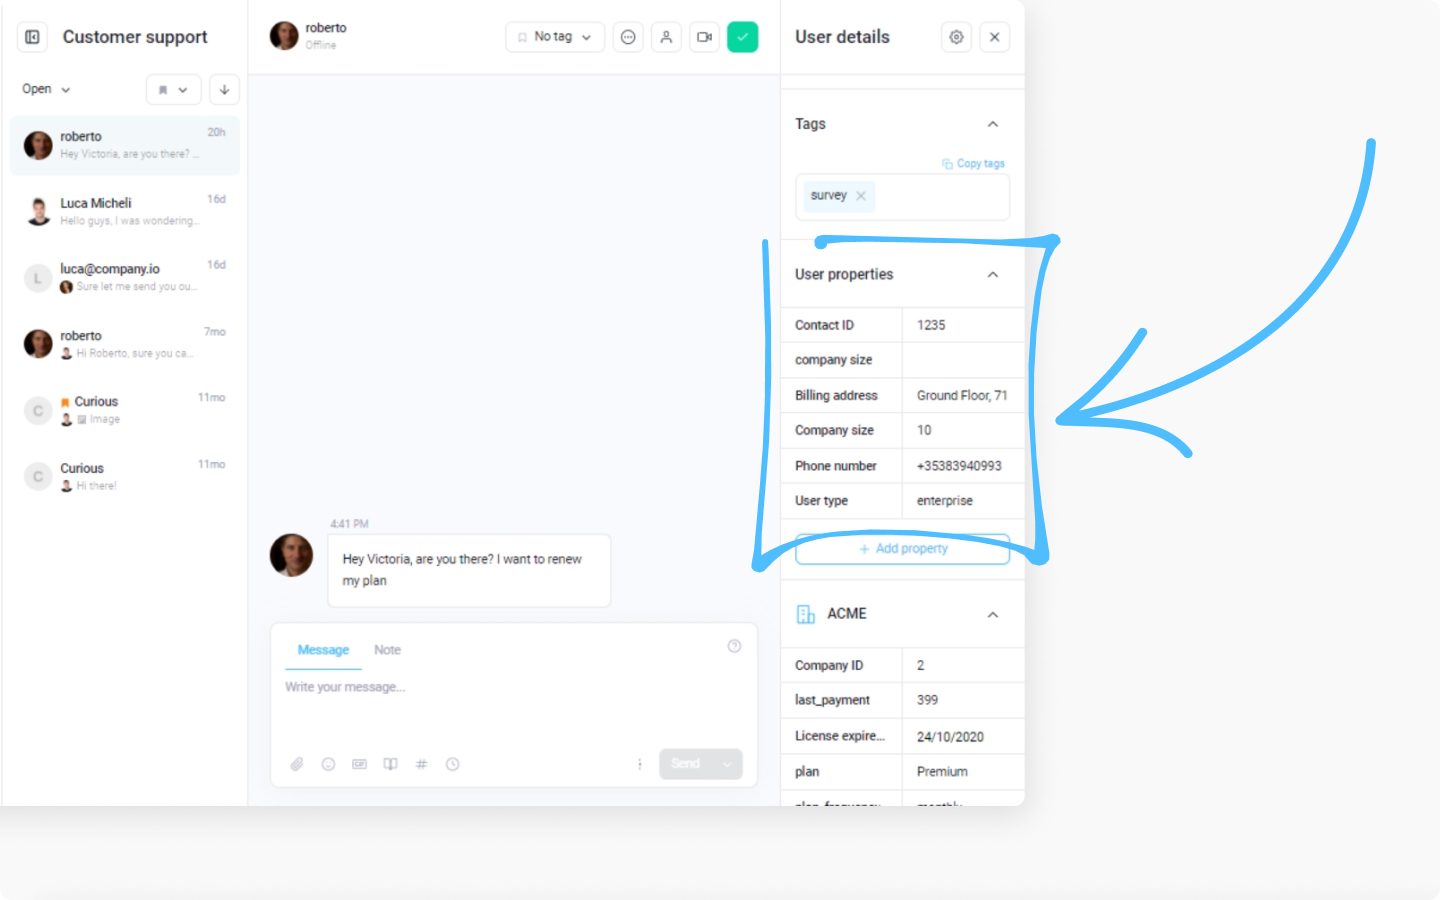
SaaS product-related properties: user's name, phone number, billing address, company size, user type, or any other property that is needed for your business to operate.
E-commerce product-related properties: user's name, phone number, address, type of client, the contact viewed page, or any other property that is needed for your business to operate.
At this time there is no way to track multiple products within one property, you can track purchases within the specific products within custom events. E.g. customerly.event ( "purchase_item_1")
There are all default and customizable properties.
Company properties are also a set of important information about the company of the user such as last payment, company owner, subscription plan, the license expires at, and many more.
Properties are the perfect way to track multiple information about your users and use it for marketing and customer support purposes.
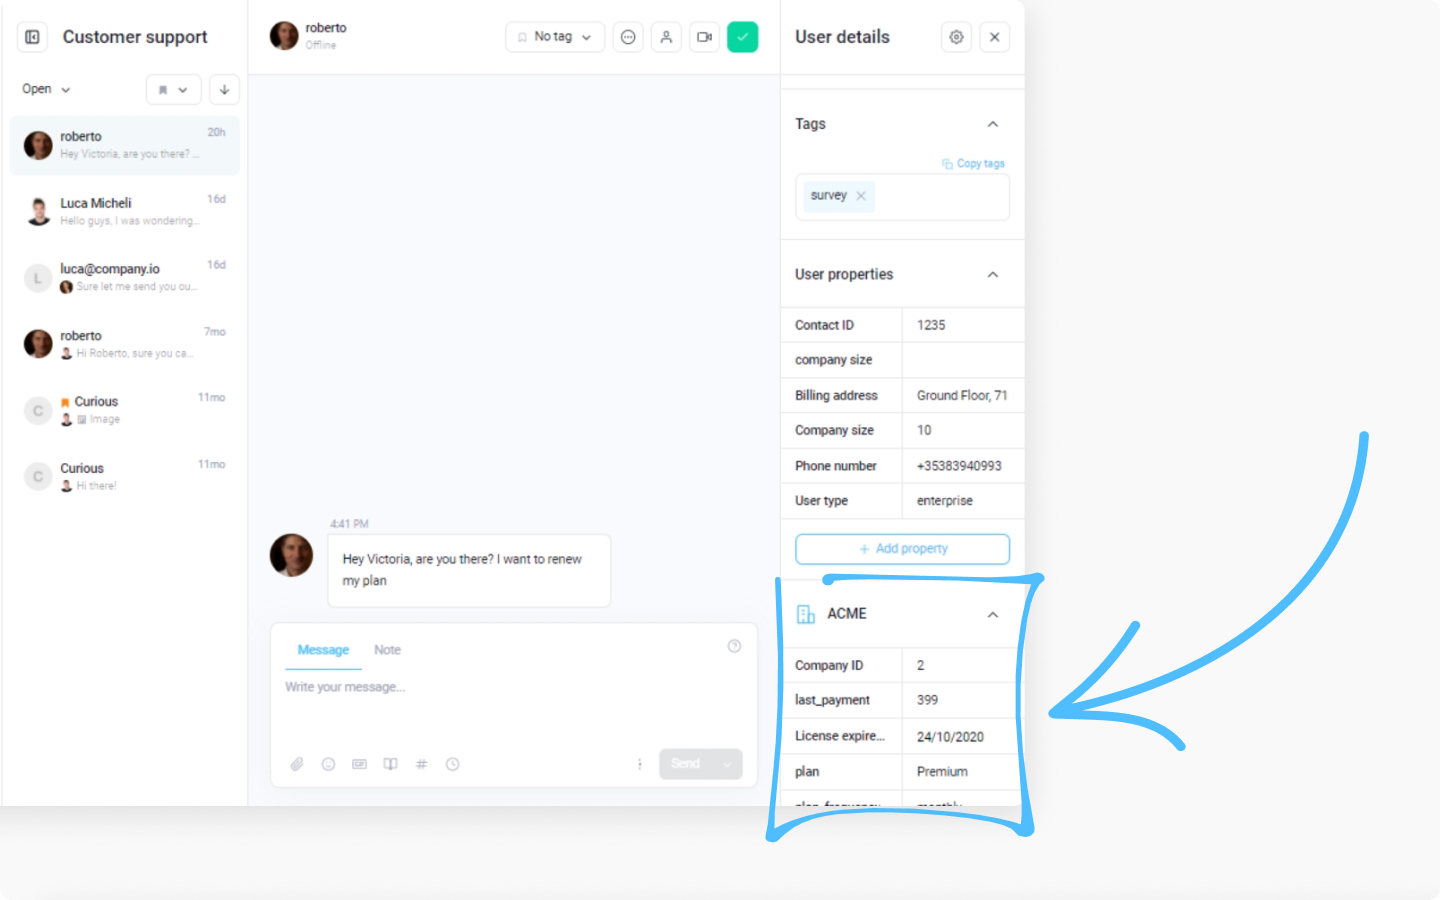
Where do I find contact and company properties in my inbox?
Go to your inbox
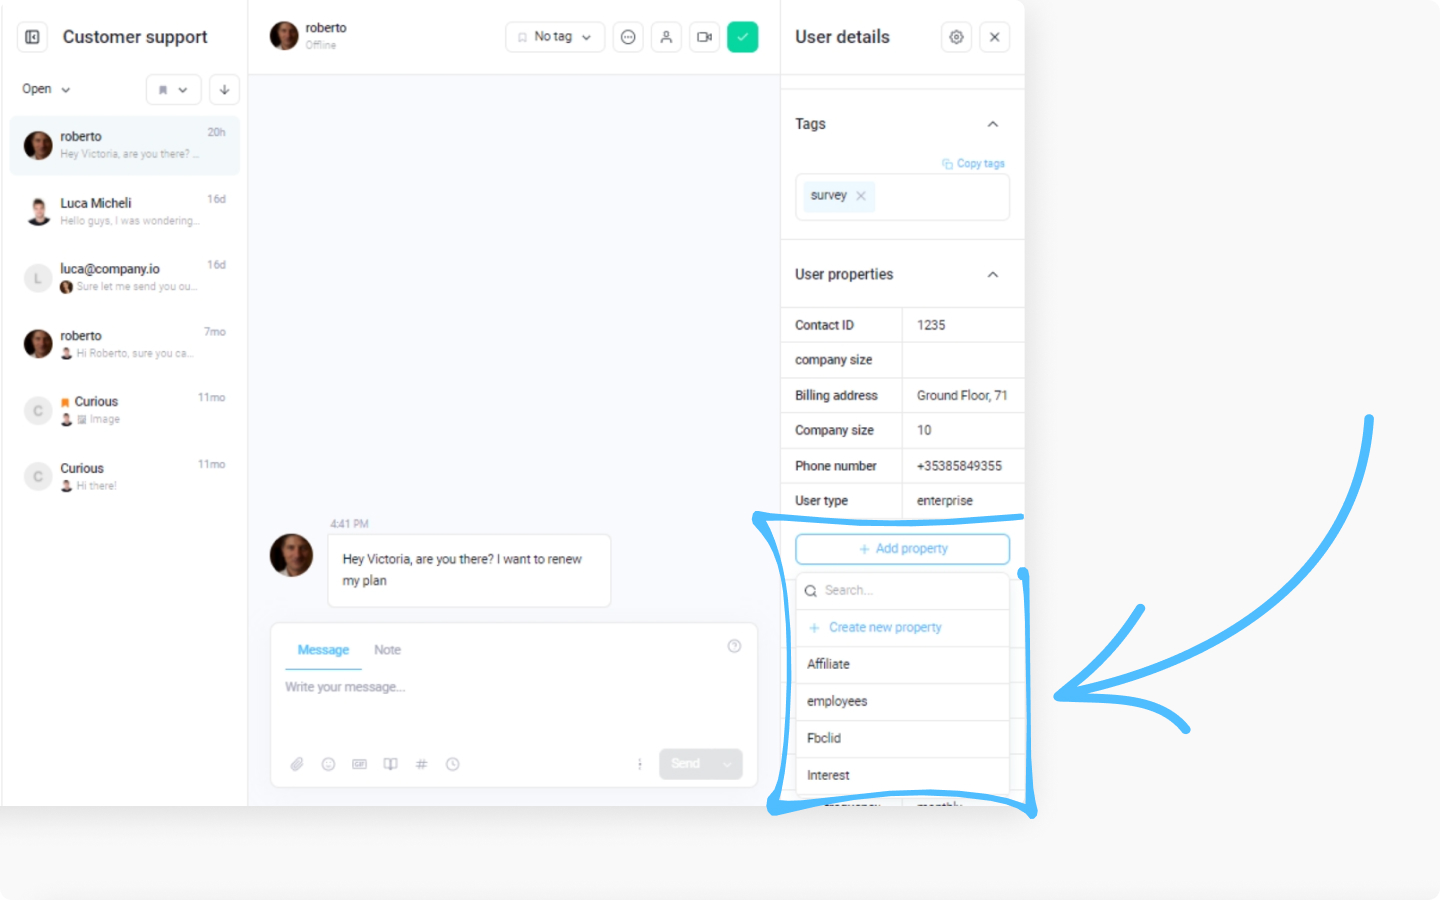
Take a look all the way at the right sidebar and scroll down if needed
You will see user and contact properties.
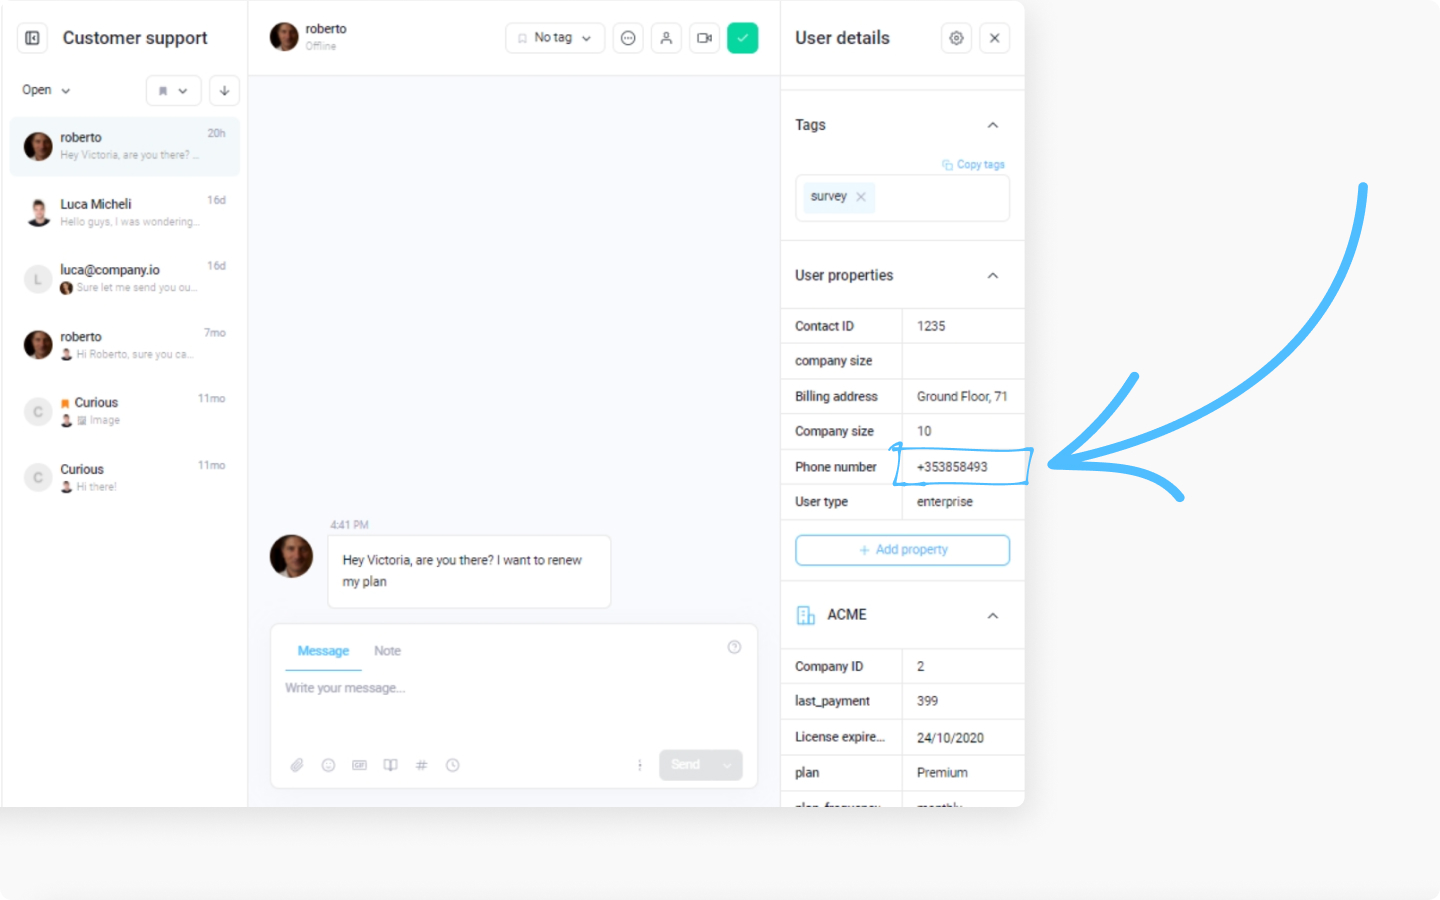
You can edit the existing properties, to do so, click on the property key and edit it in the typing area
To add a new property, click on 'Add property'
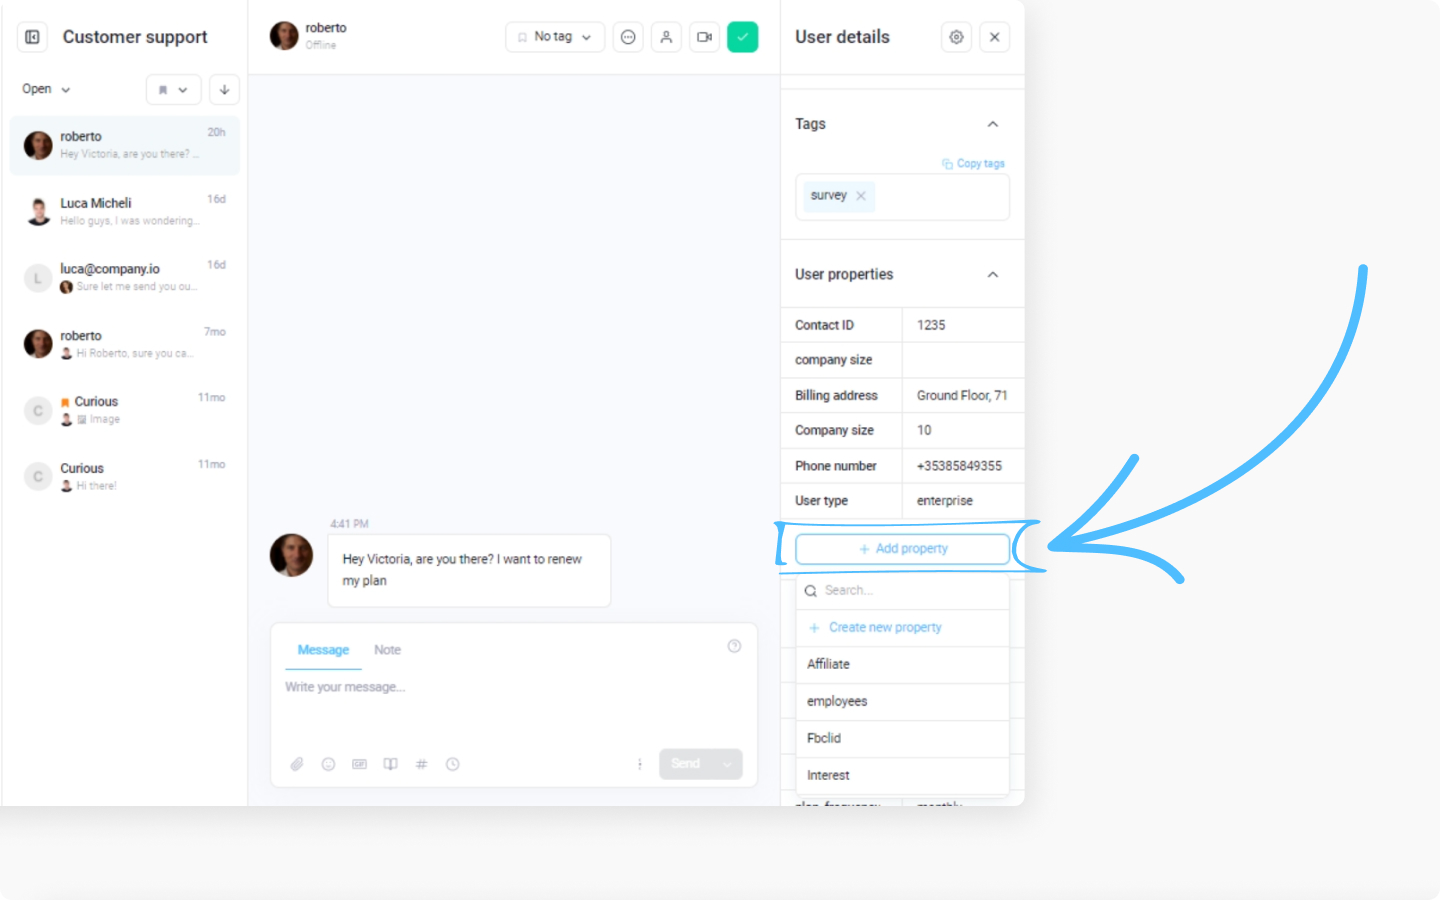
Then you can select an existing company or search for it, simply click on it and it will appear in the properties
If you want to create a new property, click on 'Create new property'
In the new popped-up window, add property displayed name, select property type:
Text property (eg. Affiliate)
Number property (eg. 1,2,10000)
Date property (only timestamp in seconds will be accepted)
Boolean property (true or false, 0 or 1)
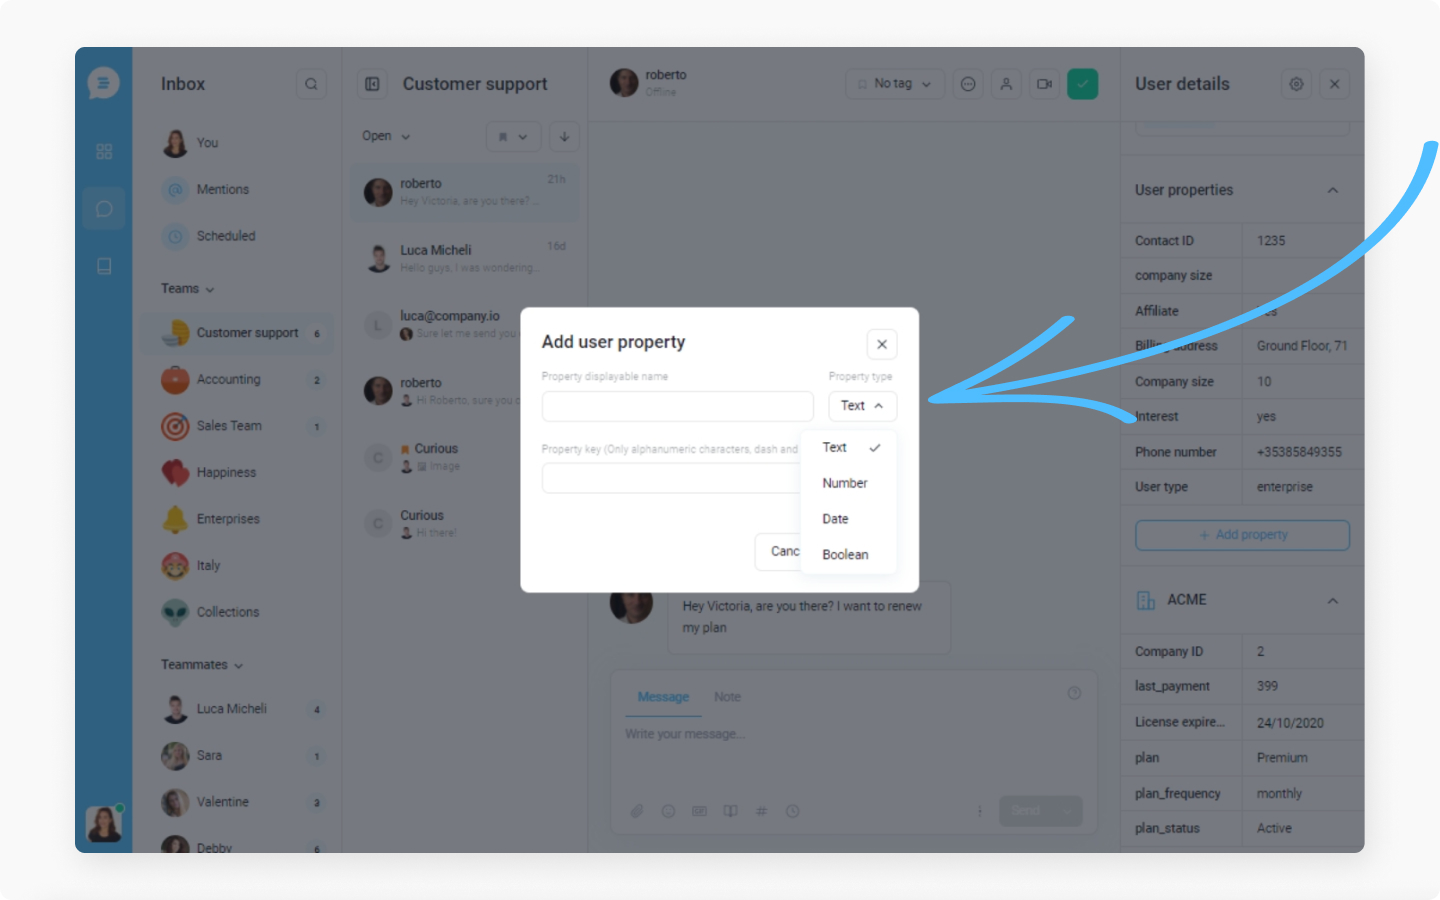
We selected text property type
Add property key. Note that only alphanumeric characters, dash, and underscore are allowed
After you typed in the property name and key and selected its type, select 'Add'
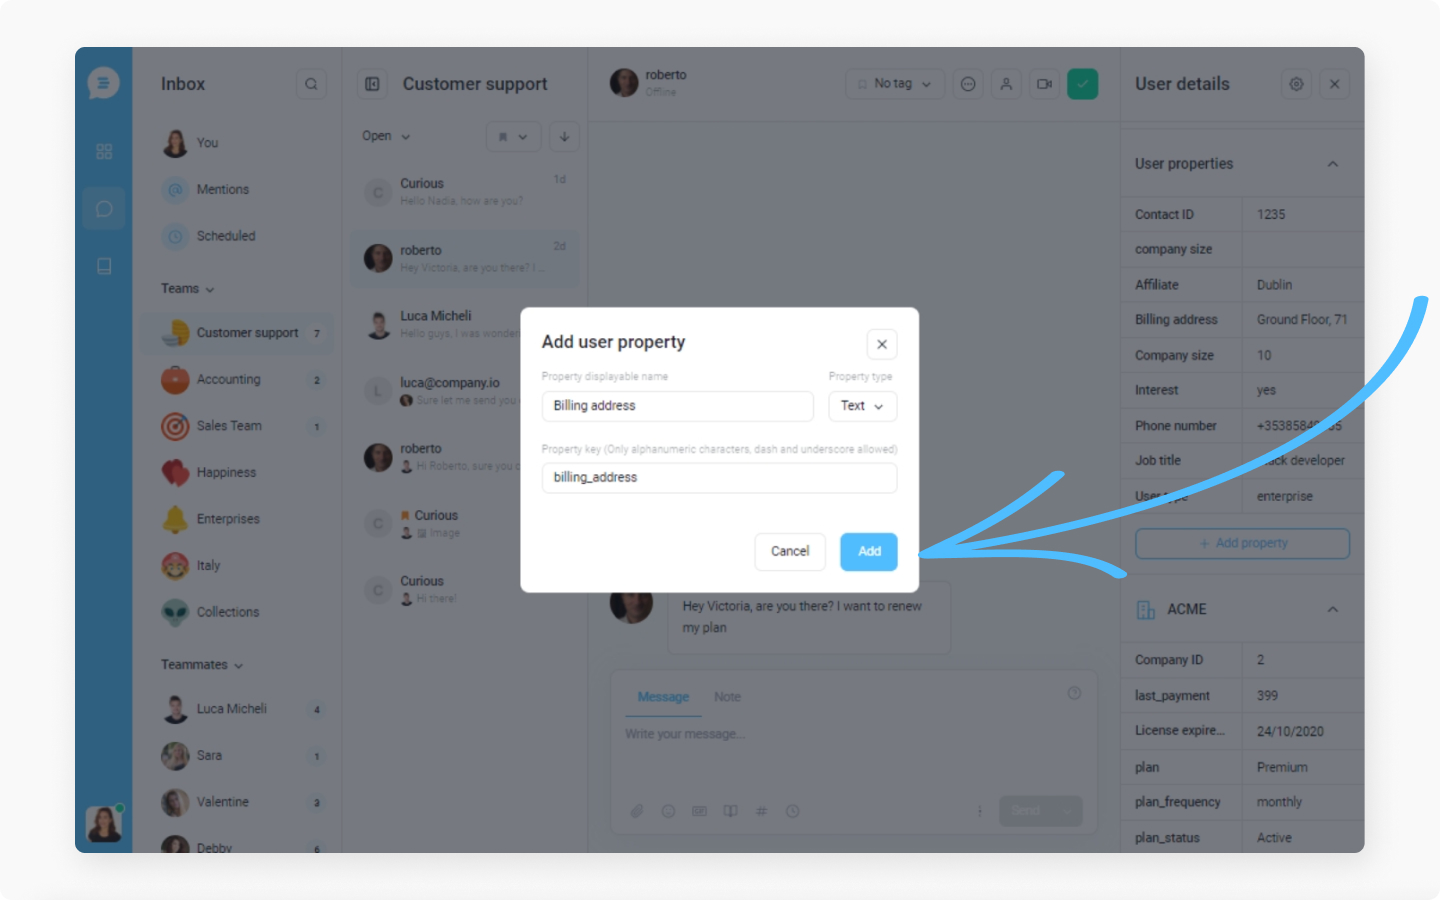
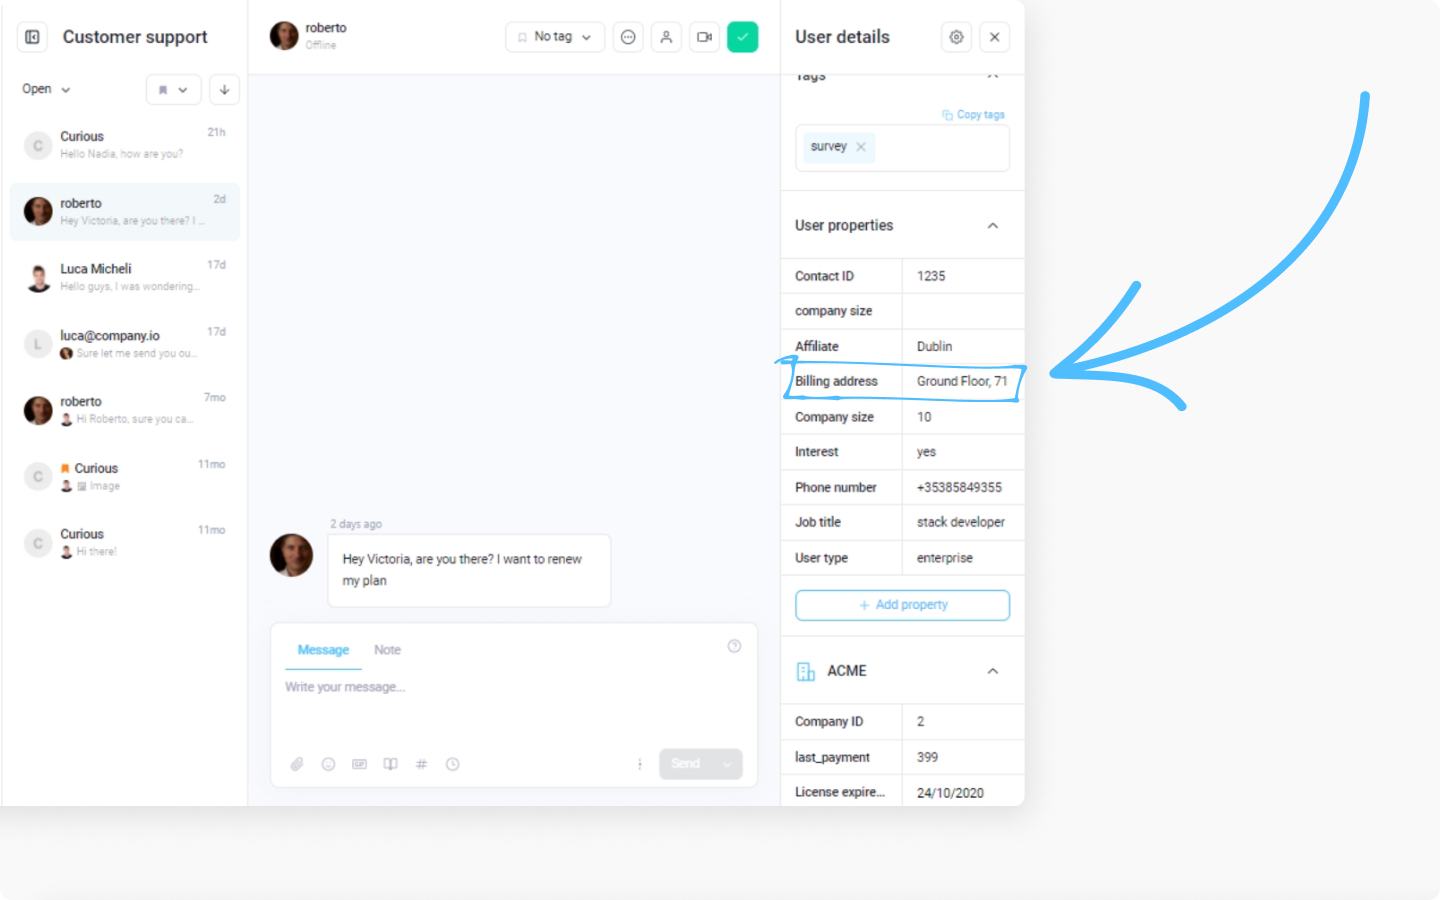
The new property was added
Discover more:
Learn more about contact properties with a Complete guide on contact properties
Properties are also used in email marketing automation. Find the best way to reach out to your audience via email marketing automation with the help of contact and company properties.
Do you want to learn about how to score your contacts to meet your business needs and define them accordingly to their qualities? Check the 'Rating contacts based on your business needs' article.